
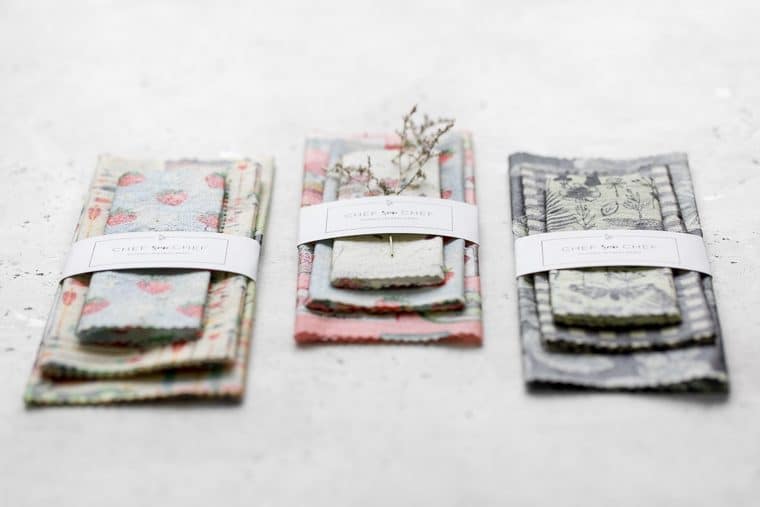
A fun craft project that reduces plastic use, food waste, and expenses, our method for making Reusable DIY Beeswax Wraps is simple and effective and aims to reduce your carbon footprint while having fun in the kitchen.
Philip and I were recently gifted a pack of reusable food wrappers and at first, we didn't know what to do with them. We had seen them in boutique kitchen stores, food conferences, and local farmer's markets, and we're always curious but just never brought ourselves to use them.
After having sat in our drawer for a few weeks, it wasn't until we were out of plastic wrap that Philip decided to give them a try. He had wrapped half a lime and a bunch of leftover cilantro carefully in the beeswax wraps and placed them in the refrigerator. A week later, expecting the herbs to have turned bad, Philip opened the wrap to reveal fresh and bright cilantro. Now they are a fixture in our fridge and lunch boxes, wrapping everything from sandwiches, our morning sausage breakfast sandwich or fried egg sandwich to our kids' mini banana muffins and sweet potato cornbread.
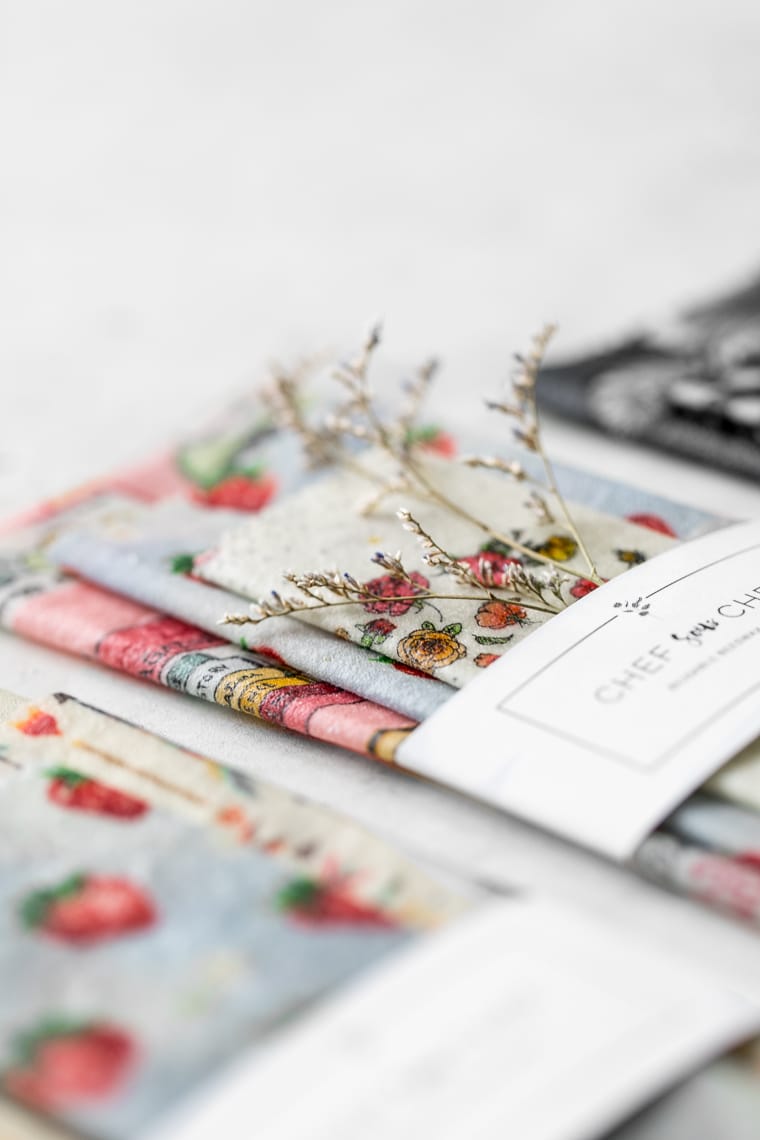
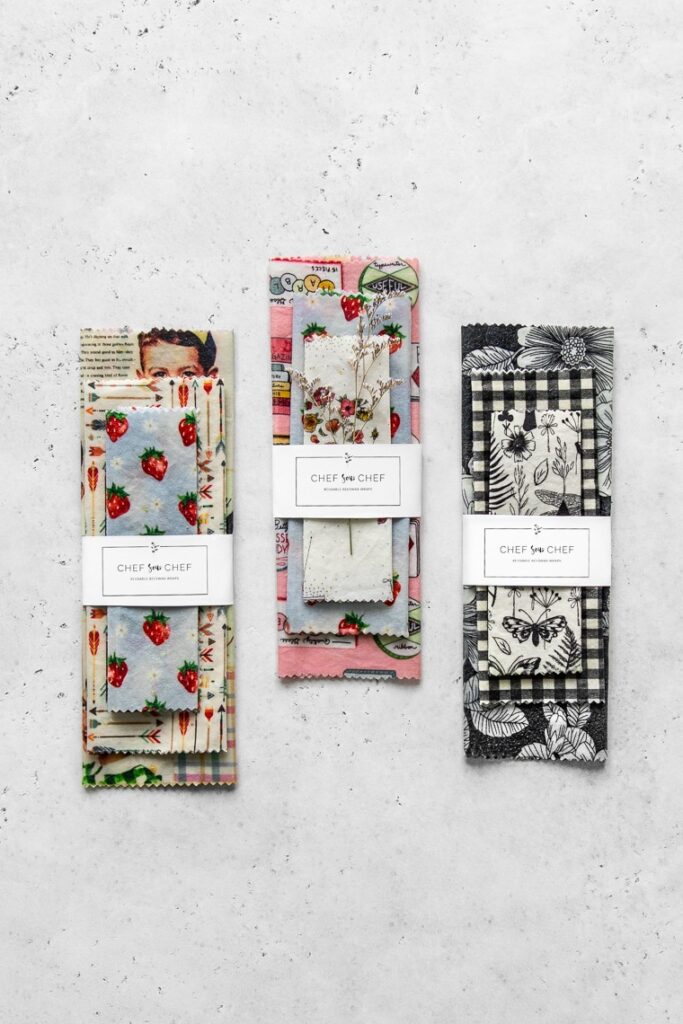
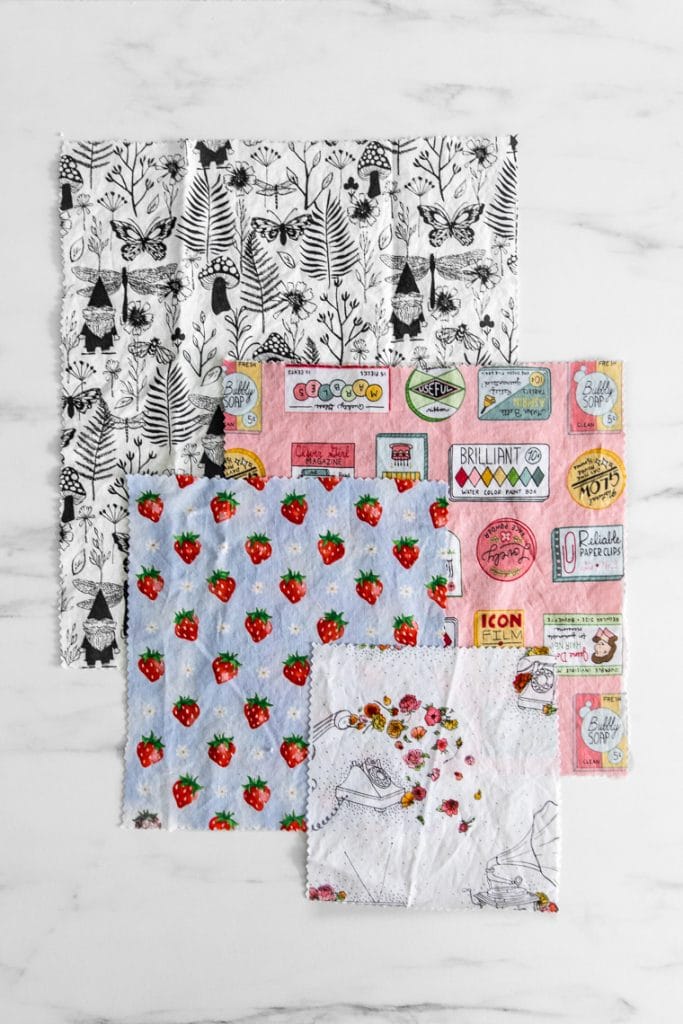
What we love about beeswax wraps is that they are an eco-friendly alternative to using plastic wrap, they're made from natural ingredients and they last up to a year with gentle care and wash. Our favorite part? Browsing the fabric store for fun patterns that are personalized to our tastes.
What are Beeswax Wraps?
Beeswax wraps are a natural alternative to plastic wraps. Pieces of cotton fabric are saturated in a mixture starting with a base of beeswax and usually mixed with some form of resin and oil. The wraps are pliable and breathable, allowing them to be molded over food or containers while keeping their contents fresh. They can be used on almost any food (except raw meat) and can be cleaned simply with cold water and mild detergent.
How to Make Beeswax Wraps
There are many variations out there from the super simple method of sprinkling beeswax on fabric and popping them in the oven or ironing them between parchment, to ones a little more complex involving tree resins and oils. We reviewed the pros and cons of each method, finding that using just beeswax, while the simplest method, lacked sealing ability and tended to degrade more quickly. Adding resin and oil to the beeswax provided the stickiness you needed for a good seal while allowing them to be pliable.
After a couple of craft days testing different ratios, we found the perfect combination of beeswax, pine resin, and jojoba oil for the most effective food wraps.
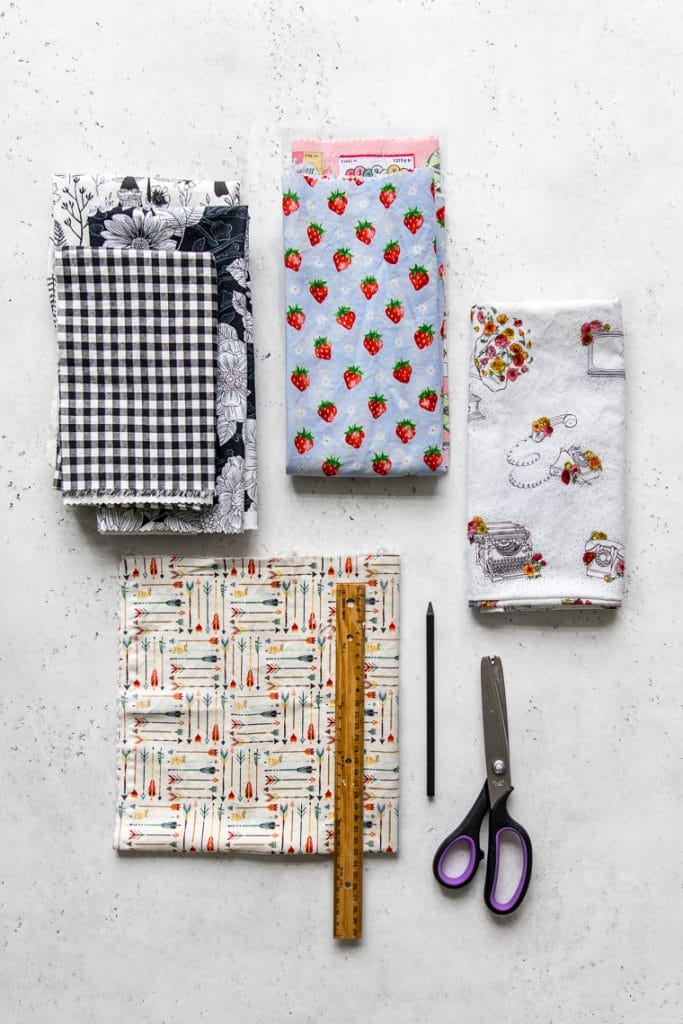
What You Need to Make Reusable Beeswax Wraps
Except for the actual food wrap ingredients, most items you should have available at home. For our DIY beeswax wraps you'll need beeswax, jojoba oil, pine resin, cotton fabric, a paintbrush, scissors or pinking shears, baking sheets, parchment paper, a heatproof mason jar or measuring cup, string or clothesline, clothespins or clips.
What Type of Fabric Do You Use?
Natural fabrics are the best choice for making reusable food wraps. Synthetic fabrics could melt while being made and potentially expose the food you're wrapping to chemicals. For that reason, 100% cotton, organic if possible, is your best bet. It's relatively inexpensive and can be found in a variety of colors and patterns. Make sure to wash and dry the fabric before making the wraps.
Best Sizes for Food Wraps
You can make your homemade reusable wraps any size you desire, just ensure that they will fit on the baking sheet. We make a variety of sizes for different purposes. 4-inch squares are great for covering containers the size of cups. Larger 8 x 14-inch rectangles can be used to wrap cucumbers, bunches of herbs, or leftover baguettes. Our favorite size is 10-inch squares as they are good for wrapping almost anything.
Beeswax, Jojoba Oil, and Tree Resin Recipe
Making the mixture that is spread on your wraps is simple. Pour 2 tablespoons of jojoba oil into a mason jar or measuring cup. Add 6 tablespoons of pine resin and 1 cup of beeswax pellets and melt in a double boiler. Stir every few minutes until completely melted and incorporated, about 30-40 minutes.

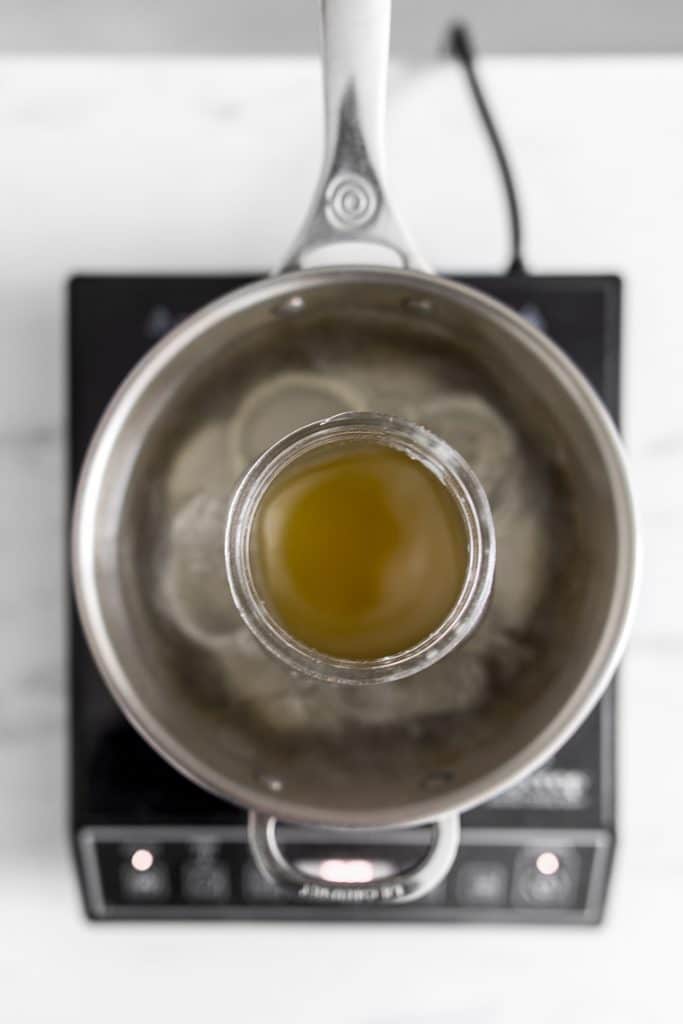
A Couple of Notes About the Double Boiler
To make homemade food wraps, you will need to set up a double boiler using either a wide-mouth mason jar or a heatproof glass measuring cup. Both work well, but we found the mason jar was a little susceptible to tipping when sitting in the pot of boiling water. Prevent this by placing mason jar rings on the bottom of your pot and setting the mason jar on top of them. The measuring cup is more stable, but with the resin being very difficult to clean, use a measuring cup you don't mind having to scrape clean.
Turning Fabric to Food Wraps
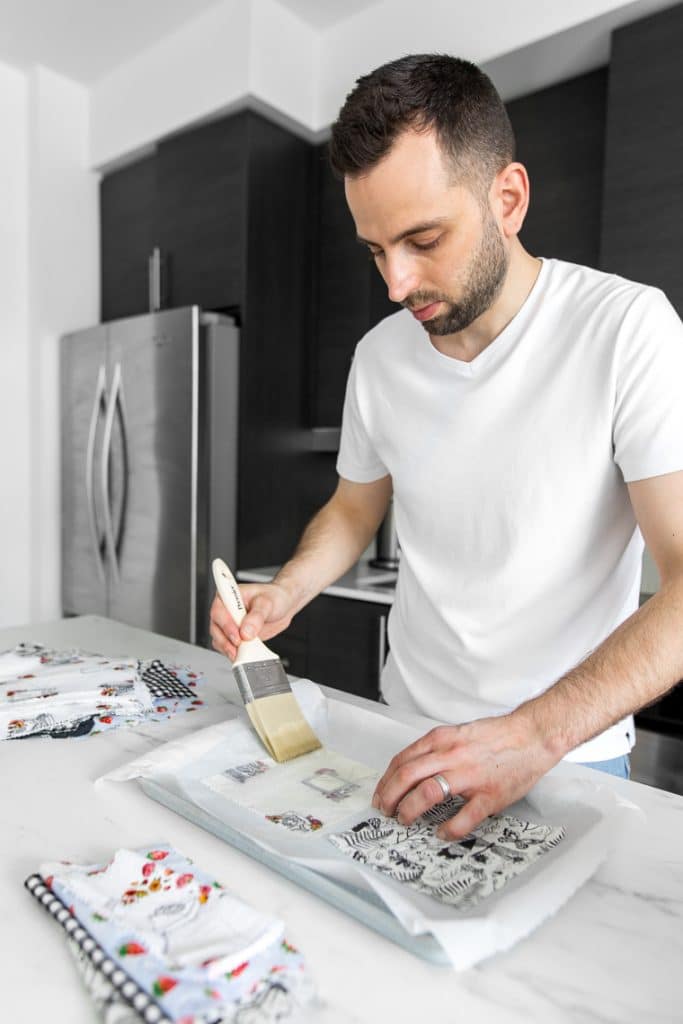
Once your wax has melted, preheat your oven to 300° F. Line baking sheets with parchment paper or aluminum foil. Lay a piece of fabric on the baking sheet and brush with the wax mixture. Don't worry if it hardens, it will melt in the oven.
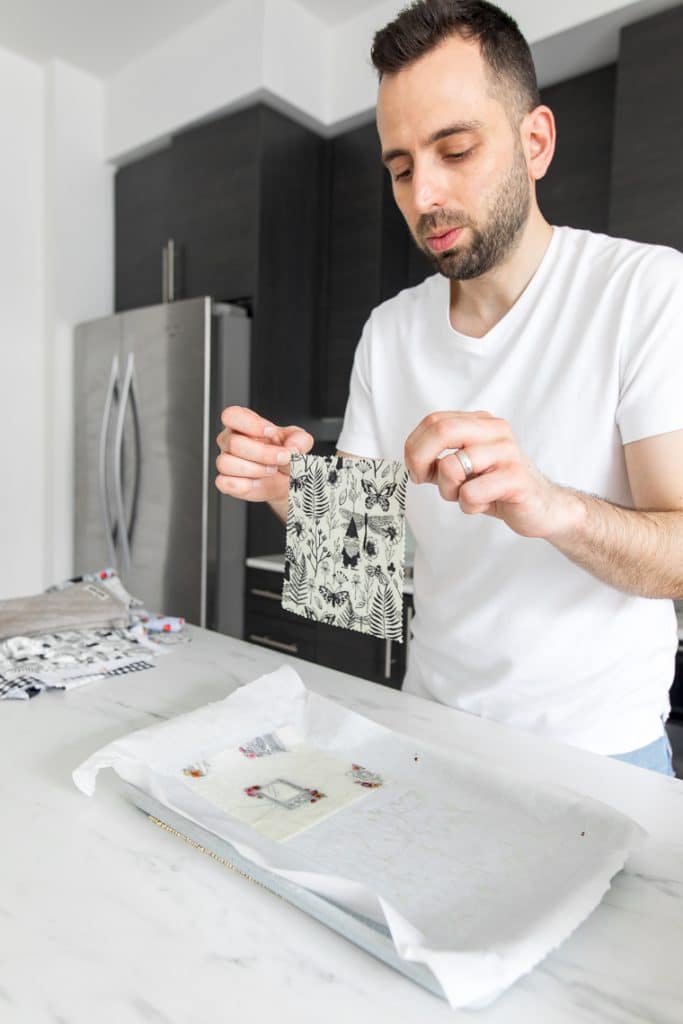
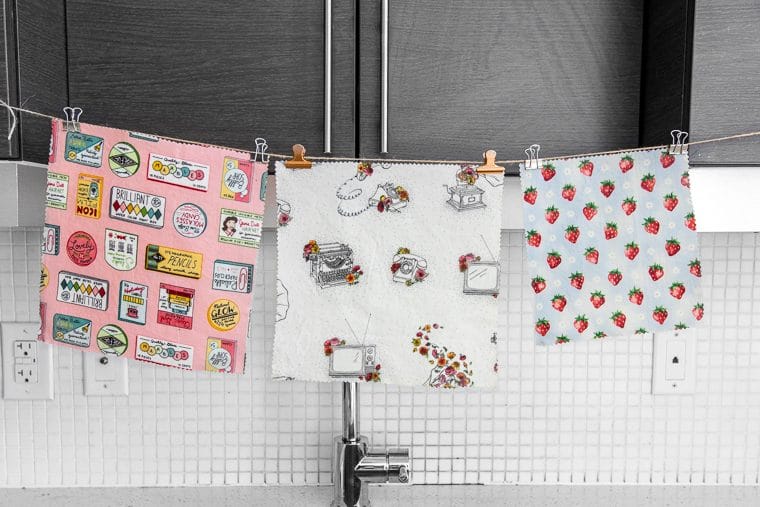
Place in the oven for 3-4 minutes, then flip the fabric and brush additional wax on areas that aren't saturated. Put back in the oven for another 3 minutes. Carefully pick up the fabric from its corners using tongs and allow any excess wax to drip off. You can use your fingers if you're feeling brave. Clip the wraps on a string tied between two cupboards to dry completely, about 5-7 minutes. Wash the food wraps with cold water and dry them before storing them until ready to use.
Care Instructions for Reusable Beeswax Wraps
Homemade beeswax wraps will last up to a year or more with regular use and proper care. Wash the wraps with cold water and gentle detergent. If the wax begins to deteriorate, pop the wraps in your oven at 300° F for a few minutes. This will redistribute the wax and should give you an additional 4-6 months of use.
Beeswax Alternatives to Make Vegan Food Wraps
If you're vegan, don't worry, you can still make your own food wrappers. Instead of beeswax, you use carnauba wax. You can get a recipe to make vegan food wraps from Mountain Rose Herbs.
Shop our Homemade Reusable Beeswax Food Wrap Recipe
Below are affiliate links to products that will assist you in making our DIY Beeswax Wraps. If you purchase an item through the links, Chef Sous Chef Inc. will receive a small commission. There is no additional cost to you.
Essential Ingredients for Making Homemade Beeswax Wraps
Essential Tools for Making Homemade Beeswax Wraps
Thank you for helping support us through these purchases. If you have made this recipe, please let us know in the comments below!

How to Make Reusable Beeswax Wraps
Equipment
- Wide-mouth mason jar or heat-safe measuring cup
- Paint brush
- String
- Clothes pins or clips
- Organic cotton fabric
Ingredients
- 2 tablespoon organic jojoba oil
- 6 tablespoon food grade pine resin approx ¾ oz
- 1 cup organic beeswax pellets approx 2¾ oz
- 1 ½ yards 100% cotton fabric organic preferred
Instructions
- Add jojoba oil, pine resin, and beeswax to mason jar or measuring cup.
- Fill the pot with water so that the water line is above the ingredients in the jar. Heat the water on high-heat until it begins to boil, then turn heat down to medium-high to maintain a light boil. Add water to the pot as necessary to ensure the water line always stays above the ingredients in the jar.
- After about 10 minutes, the beeswax should be partially melted and you can begin stirring the mixture every 5-7 minutes, until both the pine resin and beeswax have melted and combined, about 30-40 minutes. Reduce the heat to a simmer and leave the jar in the water while you are making the wraps.
- While the ingredients are melting cut your fabric into your desired shapes and sizes.
- Once the beeswax and pine resin have melted, preheat your oven to 300° F. Line two baking sheets with parchment paper. Place a piece of fabric on each baking sheet and brush with the beeswax mixture until the fabric is saturated. Don’t worry if it hardens as it will re-liquify in the oven.
- Put the baking sheets in the oven for 3 minutes. Remove and turn the fabric over using tongs (or fingers if calloused or you have a high resistance to pain). Brush additional wax on any spots of fabric that aren’t saturated. Place the pan back in the oven to bake an additional 3 minutes.
- Using the tongs, carefully lift the fabric from two corners and allow any excess wax to drip off. Hang the wraps using clothespins or clips on a piece of string and allow to fully dry.
Recipe Notes
- The pine resin is very difficult to remove from anything once hardened, ensure to wear grubby clothes and use equipment you aren’t too attached to.
- Place mason jar rings on the bottom of your pot to prevent the mason jar from tipping while melting the wax.
- If the pine resin isn't completely melting, it is not getting hot enough. If this happens, transfer the ingredients to a non-stick pan (or pot you never use) and heat gently until melted.
Carol says
I have tried this and I can not get the resin to mix in, it just remains separated and in a lump. Why?
Philip Lago and Mystique Mattai says
Hi Carol. The pine resin isn't getting hot enough. I find pine resin isn't always consistent and needs to be heated in direct heat to melt properly. Use an old pot (one you rarely/never use) and heat the ingredients gently until completely melted.
Renee P says
I love the clear instructions and the photos. Instead of popping the baking sheet in the oven I used my electric griddle. I covered it in foil to protect it from drips, set it to about 275 and then put the baking sheet on top of the foil to keep it warm. Worked perfect at keeping things warm and flowing. I also used a cheap disposable foam roller I got a the dollar store instead of a brush. I think it really helped in getting the fabric covered evenly.
Karen R says
Hello, I would like to make bags, if that’s possible, large enough for sour dough boules, so my question is do you think I would need to add the pine resin as I don’t believe they’d need to be “sticky”. Or is that an ingredient that shouldn’t be omitted? Thank you for any help
Philip Lago and Mystique Mattai says
Hi Karen,
I would try one out without pine resin as a test. You could also reduce the pine resin to make it less sticky. Thanks for the question!
Jessica Moser says
How did you clean your paintbrush after each use? I'm assuming it got really sticky and waxy so it dried stiff. Did you just warm it up before brushing on your next use?
Philip Lago and Mystique Mattai says
Hi Jessica, We have a tool for cleaning pain brushes we use to remove most the wax, then warm it up to soften it for re-use.
Emily says
You said to wash and dry them before using. Hang to dry I am assuming???
Philip Lago and Mystique Mattai says
Hi Emily,
How you dry your fabric is up to you. We have always dried them in the dryer for convenience, however, air drying is fine. The important part is that they are pre-washed.
Jillian says
I think the wash and dry before using should really be wash and dry your cotton fabric Before MAKING.
I don’t believe there’s a need to wash them before using once you’ve made them.
I just wash in cool water with a gentle dish soap and hang to dry then.
Philip Lago and Mystique Mattai says
Hi Jillian, Yes, wash the fabric before making the wraps, however, I do wash them after making them before the first use. I don't think it's 100% necessary but it what I always do. Thanks for taking the time to comment!
Mags says
Great recipe and very clear instructions. Thank you so much! I have just tried this and am thrilled that I now have lots of usefully sized wraps at a fraction of what they would cost in the shops.
Philip Lago and Mystique Mattai says
Thanks so much. We use our all the time. I'm sure you'll get lots of use out of them!
Evelyn Leeson says
Have not tried this yet. Wondering if I can use washed, untreated raw silk.
Philip Lago + Mystique Mattai says
We personally haven't tried alternative fabrics. I don't see an issue with trying silk, but if you have a concern you can test a small amount to see how it performs.
Lynn says
Can soy wax be used instead of beeswax?
Thank you!
Philip + Mystique says
Hi Lynn,
Absolutely, soy wax works great to make the wraps vegan and can be used at the same ratio as beeswax.
Kashuen says
I just made batch and they’re all pretty sticky and the jar that I tried to cover has waxy marks afterwards. What could go wrong to cause that?
Philip Lago and Mystique Mattai says
Hi Kashuen,
These wraps are a tacky, but they shouldn't really leave a residue. The wax may have been applied a little too thickly or the pine resin may have been extra tacky. I find pine resin isn't always 100% consitent.
A Winter says
Thank you for including weight measurements! I get beeswax from local hives and they don’t come in pellets! And my sister gave me pine resin in big chunks. They don’t exactly fit into measuring spoons! LOL
Philip + Mystique says
Thanks for stopping by! The more information the better. Sounds like you're starting with the best of local ingredients. Let us know how the wraps turn out.
Lisa says
I gave this two tries. Just couldn’t get tape resin to blend. Mixed all and it formed a taffy like glob separated from the wax and oil. Tried to do resin first. It melted. Then added wax. Blended ok at best but then after adding oil it just separated again. I give up! Really wanted this to work.
Tamsel says
Im interested in this same question. My resin also separated from the wax and made a sticky glob..What is the best way to get all the products to combine.
Philip Lago and Mystique Mattai says
The resin we use doesn't have this issue, however, pine resin does have a higher melting point then beeswax. If the pine resin isn't melting it needs a higher temperature. Try melting it in an old pot then slowing pouring it into the beeswax while stirring it, or make the entire mixture in an old pot. It will be very difficult to clean, but can be done with rubbing alcohol. Hope this helps!
Jillian says
I am having the exact same problem.
I wonder if the resin we are using is subpar? I crushed mine into a fine dust thinking it would melt in better, but it still just gummed up.
Philip Lago and Mystique Mattai says
Hi Jillian, If the pine resin isn't melting in the double boiler, then it isn't getting hot enough. I find pine resin isn't always consistent and sometimes needs to be heated in direct heat to melt properly. Use an old pot (one you rarely/never use) and heat the ingredients gently until completely melted.
Kendra says
Hi! I am looking for an alternative to wrap homemade chocolates, and I’m wondering if these would work. My concern is that the oils in the chocolate will combine with the oils/wax in the fabric, especially if they are unrefrigerated for any period of time. Has anyone else tried to use these as candy wrappers, or are they just meant to be placed on reusable food storage containers? Thanks for any advice you can give me!
Philip + Mystique says
Hi Kendra,
Thanks for the question. I personally wouldn't use them for chocolate unless I was in a pinch. If the chocolate were to melt, it could get into the fabric and could take on the flavor of the wrap ingredients.
dionne wilsher says
thankyou for this recipe!
They came out great, but on first use the wraps looked very cracked, and only way to get rid of them was to out them in the oven again. have I done something wrong?
Philip + Mystique says
Hi Dionne, Thanks so much for taking the time to comment! I'm honestly not sure why the wraps would crack like that. The only thing I can think of is that it would have something to do with the beeswax, perhaps the ratios are off slightly, or that it wasn't fully mixed. Wish I could give you a definitive answer, but glad you enjoy them none the less.
Jenny says
Hi I hope you can help.
I am using much less resin than most recipes and yet my fabric turns a shade of yellow and with some unsightly yellow patches. I don't see that in any instruction images on the internet or on YouTube.
It is not my wax or the jojoba as it doesn't happen when I only use them alone.
Does resin have an expiry date? I can't find any info on this anywhere.
Philip + Mystique says
Hi Jenny, I do definitely find that the resin does cause some yellowing that can't be avoided. I tend to use coloured fabrics so it doesn't affect the end result noticably.
Janie says
Great recipe! I made eight each 10x10" and 7x7" wraps. I'm going to make some larger ones when my full sheet pan arrives!
Gabby says
Hi, I just attempted to make this recipe and I took it out of the oven after the first coat and all if the colour from my fabric has extracted for some reason. I prewashes my fabric as per your suggestion. To you have any ideas why this would happen?
Philip + Mystique says
Hi Gabby,
I wish I could give you a definitive answer, but unfortunately, I have no idea why the fabric would bleed, especially after pre-washing. This is part of the reason I pre-wash the fabric before making the wraps. The only thing I can think of is if the dye is heat sensitive and you washed the fabric in cold water. I'm sorry I can't be of more help but hope the wraps turned out ok none the less. All the best!
Afra Davis says
Tried and true! Your recipe and instructions are incredible. I made these yesterday and everything turned out beautifully. Thank you for sharing your technique and measurements!
~ So Appreciative
Philip + Mystique says
Thanks, Afra! We're so happy you love this method. It's such a fun project 🙂
Paulina Munoz says
How many wraps does this recipe make?
Chef Sous Chef says
Hi Paulina,
The yield will depend on what sizes of wraps you make, however, we find it to make cover about 10sqft of fabric.
Molegal says
I am prepped to make these. I'm puzzled by the directions to flip after 3-4 minutes and put more wax on unsaturated parts. Doesn't this make the right side of the fabric, outside of the wrap, sticky?
Chef Sous Chef says
Hi there, the entire fabric gets saturated in the wax mixture. The idea of flipping and brushing both sides is to ensure that the wax is evenly distributed. Both sides of the wraps will be tacky.
helen Pilley says
I have a gas oven which apparently is unsuitable for making wraps - how do I make them using an iron please?
Chef Sous Chef says
Hi Helen, I have not heard there being an issue with using a gas oven provided the wraps aren't too close to the flame and temperature not too high, however, if you prefer to use an iron, you can cover it with heavy-duty foil and heat the wraps until the wax is evenly distributed. We have not personally done this so I cannot speak to the quality or results but this is the method I have read works best. Good Luck!
Cheri says
I made several wraps and they seem to be too sticky, leaving a residue on the bowl I tried to cover and making my hands sticky also. I may have used too much pine resin. Can I successfully re-do using a little more beeswax?
Chef Sous Chef says
Hi Cheri,
Thanks for the comment and feedback. We have formulated these wraps to be a little stickier than many commercially available wraps so that it can replace using a cling wrap. They shouldn't be sticky to the point that they make your hands tacky, so I would encourage you to re-do them with a little more beeswax. Alternatively, you can wash the wraps with mild detergent and warm water, which in my experience, does help reduce some of the tackiness. Hope this helps!
Cathy Young says
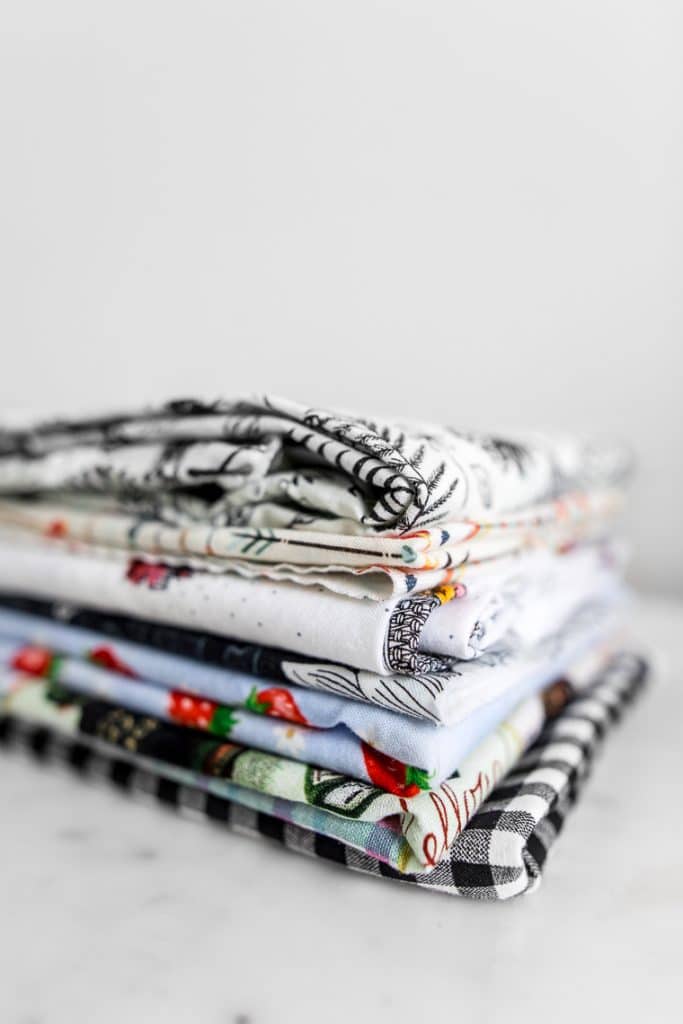
I was wondering how you store the clean wraps
Thanks!
Chef Sous Chef says
Hi Cathy,
The wraps can be folded and placed in a clean cupboard or drawer. We store ours with our reusable food containers.
Karen Settle says
Hi it is the first time I have used pine resin and jojoba oil with wax, it does make the process more messy but I didn’t mind that too much, however the resin does make a mess of the bowl and spatula I used, so guess these will not be used for anything else now. I also used a small hostess heated plate instead of the oven and it worked well. Thanks for an easy to follow recipe and instructions
Tate says
Hi there I just made these and found that my hands feel quite sticky/waxy after touching them... any suggestions on how to make them less sticky?
Chef Sous Chef says
Hi Tate,
Washing the wraps a few times with warm water and gentle detergent should remove some of the tackiness.
Julie says
This is awesome and I can’t wait to give it a try! Wondering where you got your fabrics? I’m absolutely loving the pink one with what looks like labels on it!
Chef Sous Chef says
Thanks so much! We bought our fabrics from Len's Mill Store. It is a fabric and craft shop with locations in southern Ontario.
Madeline says
Hello! Wondering if there are substitutes for jojoba oil, will another neutral oil work or does jojoba have a specific quality that contributes to the final outcome?
Chef Sous Chef says
Hi Madeline,
I believe any food-grade liquid oil can be used in substitution for the jojoba oil. We haven't used others so I can't speak from personal experience on the final outcome, but don't imagine it would change the quality significantly. Good luck!
Santiago says
When you say Food grade oils, would olive or peanut oil work or is there other specific types of oils you would recommend?
Philip + Mystique says
Hi Santiago, we strongly recommend jojoba oil for the wraps. We haven't tried others, however, through some research, I believe jojoba oil provides the best result as it protects the wraps and contents.
Leslie says
I want to make a couple of these for my homemade sourdough bread. The commercial wraps are not always large enough. A couple of questions though: (1) there are various grades of beeswax (cosmetic, craft (ie for candle making), food safe, etc.) and though I lean towards the food safe ones, am hearing people are using the craft grade pastilles to make these wraps. Is the craft grade acceptable and safe for wraps? (2) will the pine smell permeate my bread?
Chef Sous Chef says
Hi Leslie,
Personally, we would stick to organic food-grade wax, but we haven't even ventured into other grades, so I can't really speak to that. You may get the pine smell on the outside of the bread, but it shouldn't affect the overall flavour too much. Thanks for the questions!
Anne O’Dwyer says
Hello
I have a friend who has beehives and I wii feted if I can use the wax straight from the hive or if I need to process it in some way first? I’m looking forward to getting started!
Thanks
Anne
Chef Sous Chef says
Hi Anne, You will need to clean and render the wax before using it for the wraps, here is an article I found on how to do so: https://www.milkwood.net/2018/11/19/beeswax-diy-making-beeswax-wraps-how-to-render-your-own-wax/
Good luck with the wraps. Let us know how they turn out!
Emily says
Hi! Thanks for this. I havent tried yet but I am wondering if the smells (specifically pine) during the melting/baking process are strong and/or if you happen to know if they're dangerous for pets. I've been putting off making mine for this reason (3 cats, 1 with mild asthma) and couldn't find any info about it online. Not sure if you'd know, but thought I'd ask about how strong the smell was while making. Thanks!
Chef Sous Chef says
Hi Emily,
There is definitely a scent from the pine resin, which can be strong depending on the ventilation. I have made them with pets in the house without issue, however, I don't have information on whether there are any negative effects associated with the scent. Sorry I couldn't be of more help.
Rachel says
Hello
Thanks for the instructions! Very helpful indeed, as I'm in the UK and we don't use the cup weighing system here can you please do these guidelines in grams or ounces please? I would recommend you do both US and UK weights in any project you post .
Thank you
Rachel ?
Chef Sous Chef says
Hi Rachel. Thanks so much for taking the time to comment and the suggestion. We have made the adjustment to the recipe card to reflect volume and weight. All the best!
Jacqui says
Also metric would be good for the rest of the world 🙂 thanks - trying it now
Dale says
Hey Jacqui: It’s pretty easy to google the measurement conversion, I do that all the time. I’m just really appreciative of them even giving us this amazing recipe and instructions.
Carolyn Aspeslet says
I only have block beeswax can you tell me in weight please?
Thank you.
Chef Sous Chef says
Hi Carolyn, 80g (2.5-3 oz) of solid beeswax will be the equivalent of what you need for a batch of the wraps. Good luck!
Emily says
Peanut butter takes off pine resin!! Something about the oils, and if it's chunky PB it'll help scrub even more- it's a florist tip from my wife. I used it on my hands and all the utensils that were sticky when I was done :).
This recipe and method is great- I used 2 batches to make 12 wraps ranging from 9x9 to 12x12. I haven't actually put them to use yet but most of them are gifts so I'm just glad the project wasn't a disaster.
I recommend using light-colored fabric since the darks that I used are REALLY dark now. Think about how the fabric will look when wet- that's how the color will turn out when they're saturated with wax! Also the dark fabrics that I used bled the most, especially red.
Chef Sous Chef says
Hi Emily, Thanks so much for amazing tip regarding the peanut butter! I will definitely be trying it out next time. Glad you enjoyed the recipe and making the wraps. They definitely make great gifts. Happy holidays!
Sereena says
Hi there,
thx for all the measurement conversions you posted with your recipe. So appreciated!
I render my own tree (resin)pitch supply. The oil in peanut butter IS the key. In fact, the peanut part is completely unnecessary. ANY OIL will dissolve it from your skin. I just massage a dab of regular veg oil on my hands before washing with soap & water. Works like magic!
*a previous comment was deleted and this comment edited due to the wrong star amount given by the reader. Sorry, I intended to give FOUR ☆, not one.
Philip + Mystique says
Hi Sereena,
Thank you so much for the review and comments. Appreciate the tip regarding the oil, I never want to waste peanut butter 😉 Just an FYI, I deleted your previous comment with one star and added the commentary to this review. Thank you for coming back to make the change!
Kristina says
I have just finished making some wraps according to your directions. When the beeswax and resin was melting I found it separated a bit and I ended up with a gloopy blob about the size of a walnut that wouldn’t incorporate into the rest of the liquid. I continued anyway, and now the wraps are dry but don’t seem to be sticky enough to seal. Any suggestions?
Chef Sous Chef says
Hi Kristina, I have had a similar experience to you once before, but just melted it longer until I was able to combine them. The wraps should still work well for wrapping fruit, vegetables and herbs, but just may not work as well for wrapping containers and bowls. Sorry it wasn't a completely successful experience for you, but hope you still get good use from the wraps and enjoyed the project. 🙂
ann lin says
Hello! I am looking forward to making these using your recipe - yours came out gorgeous by the way! Just want to ask, in the past using another recipe (oven only), I have found my wraps to come out very yellow. Yours don’t look yellow tinted at all, and I was wondering if you used white pellets/ found that a certain method (perhaps brushing it on first) helps? Thank you!
Chef Sous Chef says
Hi Ann,
We did you white pellets, but the resin tinted the wax so they do have a light yellow colour to them. We also find that the first wrap would come out more yellow (possibly the resin sticking to the brush a bit). Good luck!
Megan says
Hi, do you know if it’s okay to use other kind of tree resin instead of pine? I have found Douglas Fir resin on some trees near where I live, and would love be able to harvest the resin myself to be even more eco friendly.
Chef Sous Chef says
Hi Megan, I believe it is okay to use different types of tree resin, as long as they are safe for human consumption. Douglas fir would be safe to use, I assume it would have the same properties as pine resin for the wraps. If you try it out please let us know how it worked for you!
Amy says
Hello- I'm using Damar resin (found at my local art supply store). It is food safe according to my research and while it has a strongish odor for a period of time it isn't very piney. It's smells more like that lovely smell of an art supply store- a little oily painty but pleasant. It is also a tree resin but just slightly less pungent. If that helps.
Philip + Mystique says
Thanks Amy,
We will have to try it out. Thanks for the suggestion 🙂
BethAnn says
Hi! I'm making these for gifts but wondering if the "pine" smell will dissipate over time? If it has a pine smell, not sure anyone is going to want to use it to cover food?? Any thoughts on this greatly appreciated. Also, your instructions were easy to follow and what a fun way to use up leftover scrap fabrics from other projects! Thanks!
Chef Sous Chef says
Hi Beth, We're so happy the project went well for you. The pine smell will dissipate but does take some time. You can try washing them with lukewarm water and soap a few times before gifting them to help it along a little more quickly.
Dawn Kalsbeek says
This is fabulous. Two questions though. How long to dry the sheets and what do I do with the leftover mixture? Can I just let it harden and then remelt it when I need it again?
Chef Sous Chef says
Hi Dawn,
Thanks for stopping by. Glad you enjoy the article! I find the wraps dry in 5 minutes when hanging, then I transfer them to a flat surface for additional 15-20 minutes before storing/packaging them for gifts. I haven't tried reusing the mixture as I always use mine up but I don't foresee there being an issue with reusing the mixture.
Darbi Klund says
Hi there! I made a whole bunch of wraps using your recipe & used your recommended brands for the products. I’m a little nervous on the outcome. They feel tacky to the touch, but I’ve had a really hard getting them to stick - not nearly as easy as I’ve seen in videos. I’ve only tried covering a mixing bowl and a plastic cup thus far, but when I held upside down (containers were empty) the wraps would start to fall off. Am I doing something wrong? I followed all proportions, melted fully, and did oven method to ensure saturation (I read through this comment section before starting to make sure I had all the tips/tricks). Any thoughts are appreciated!
Philip Lago + Mystique Mattai says
Hello,
I’m sorry the wraps didn’t turn out as expected. They aren’t meant to fully seal a bowl. If they are too tacky I find the resin will transfer to the food. These wraps are meant to be used to wrap food or cover a container, but not seal.
Thanks for the comment and hope this makes sense. All the best
Meg Davies says
Hi there,
Followed your instructions and found them really easy to follow, thank you! When I took my first wrap out of the oven, it looks like the dye has run from the fabric slightly. I washed the fabrics before doing anything. Is this normal? Its not loads but want to make sure its safe to use on food. The fabric is 100 per cent cotton.
Thanks!
Chef Sous Chef says
Hi Meg,
So glad you found the instructions easy to follow! A think a little running is fine and the beeswax and pine will seal the wraps regardless.Thanks for stopping by, happy holidays!
Liz Machin says
Thank you. I'm making them for friends as Christmas gifts. And some for me too!
Mari says
I ordered the pellet pine rosin instead of the powdered. Any idea on what the weight should be?
Thank you!
Chef Sous Chef says
Hi Mari,
Thanks for stopping by. You will want to use about 3/4oz or 20g of the pine rosin. Good luck!
Evelyn Barney says
I ordered the pellets too. Glad there is a 'hack.'
Liz Machin says
I have bees wax blocks. Any idea what weight a cup of pellets would be? Thanks.
Chef Sous Chef says
Hi Liz,
It should be about 2.5-3oz.Good luck with the project!