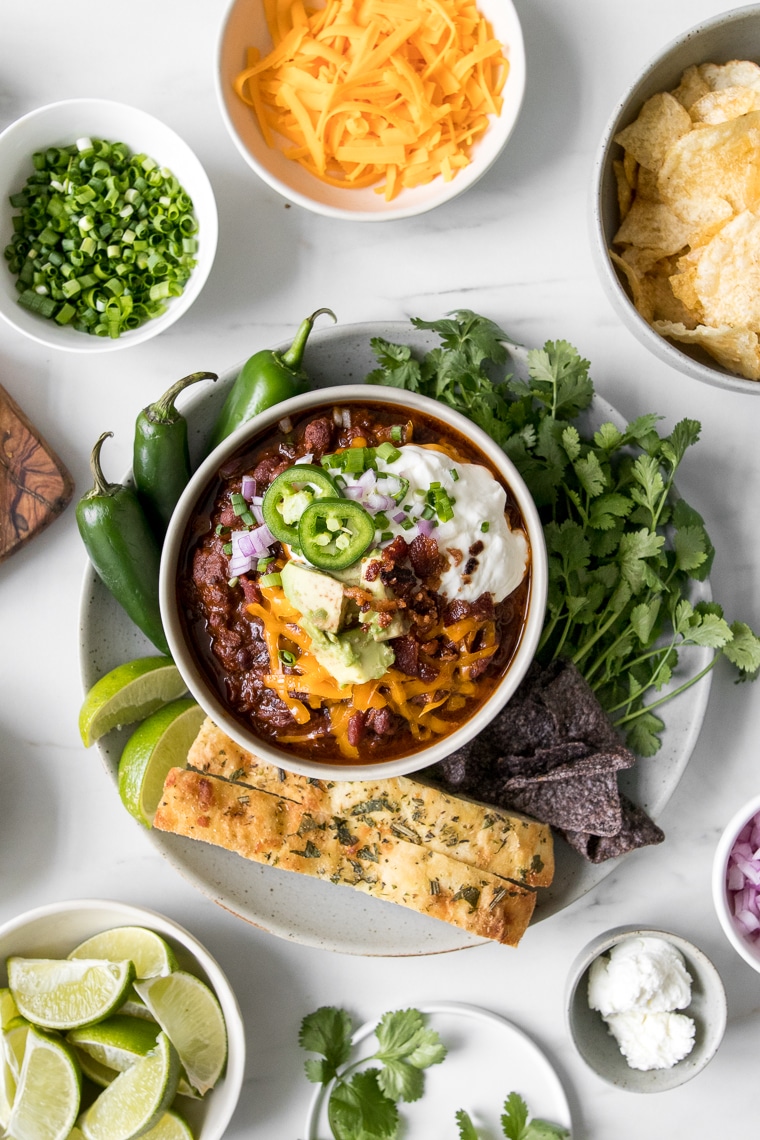
Our Homemade Chili bursts with flavor through simple and easy-to-achieve tips. Plus, learn How to Make a Chili Bar with a pot of homemade chili and a whole lot of fun toppings that encourage guests to create their own personalized chili bowls.
Jump to:
With the changing of the seasons, the first dish both Philip and I crave, with the cooler weather, is homemade chili, the best soups, and easy comfort food. It's a dish I've loved ever since I was a child and my first chance at being my own personal chef in the kitchen.
On chili night, my parents always separated the toppings into individual bowls on the table, and starting with a bowl of steaming hot chili, we'd each load up on the things we loved; a heaping handful of cheese, sour cream, and green onions was my classic trifecta, and tortilla chips on the side, of course.
As an adult chili is still one of my favorite cold-weather dishes. Soul warming, and rich and hearty, chili is a spicy tomato-based stew made with meat, chili peppers, and beans (although there's quite the debate of whether beans in a chili are authentic or not).
But want to know the best part about making homemade chili? There's always room for variation, ingredient diversity and personalized techniques that truly allow this dish to shine. In simpler terms, there's no definite recipe when it comes to making homemade chili, but our tips to building flavor through simple techniques will be sure to keep you warm and satisfied this season.
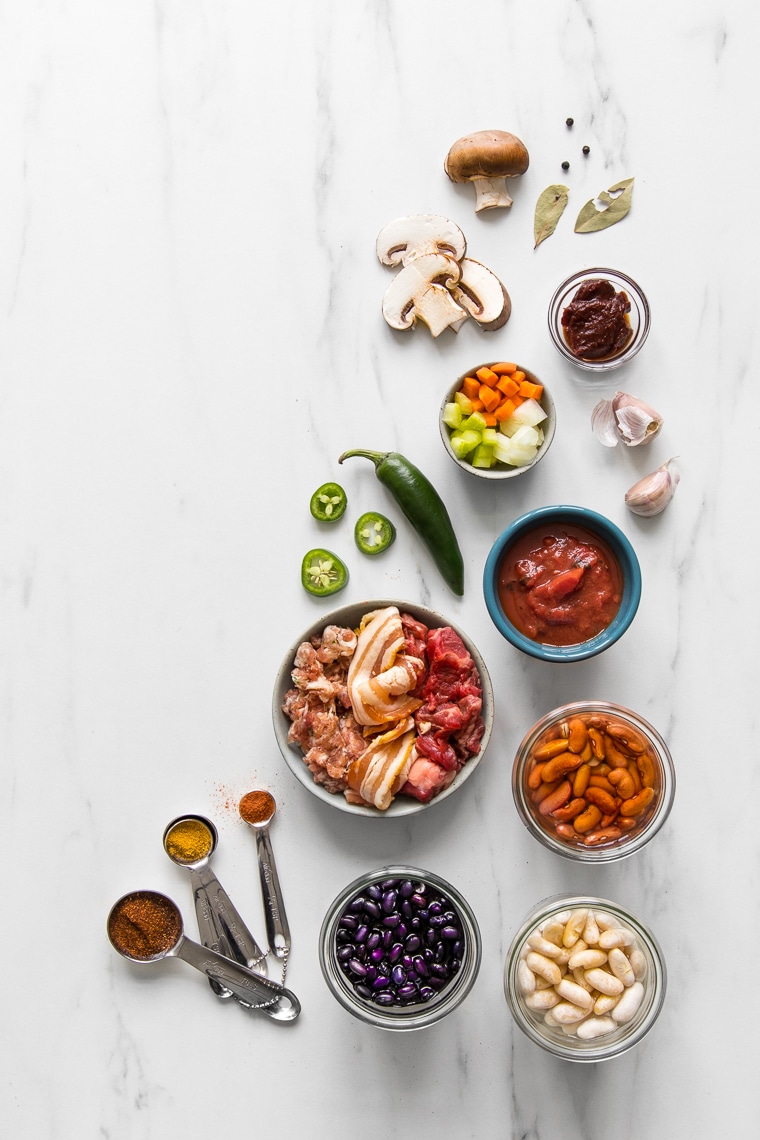
Ingredient List
- Bacon
- Sausage
- Cubed Beef
- Onion
- Carrot
- Celery
- Garlic
- Jalapeno Peppers
- Mushrooms
- Chili Powder
- Cumin
- Cayenne Pepper
- Red Kidney Beans
- White Beans
- Black Beans
- Tomatoes
- Chipotle Peppers in Adobo Sauce
- Stout Beer
- Bay Leaves
- Salt and Pepper
Find the complete recipe with measurements below.
Recipe Steps: How to Make Homemade Chili
1. Preheat a large pot on medium heat. Brown the meat, starting with the bacon, cooking until crisp, about 5-8 minutes. Place the bacon in a bowl and remove most of the remaining grease.
2. Next add the sausage in small chunks, spreading them around the bottom of the pan and ensuring there is space between each piece. Cook until browned, about 5-8 minutes. Remove the sausage into the bowl with the bacon.
3. Season the beef liberally with salt and pepper and place in the pot, again ensuring there is space between each beef cube. Brown on all sides, about 5-8 minutes. Add the beef to the bowl with the sausage and bacon and return the pot to the heat, without cleaning it.
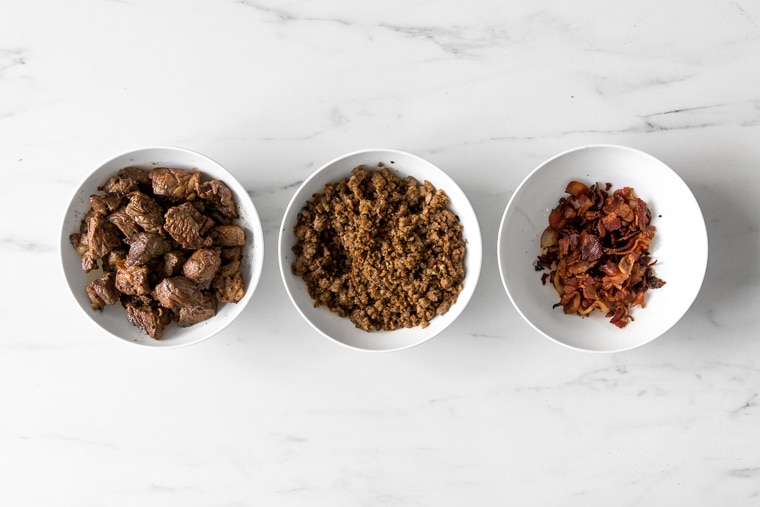
Chef's Tip: Don't stir the meat too much while it's cooking. Allow one side to get nicely browned before turning. The more area of the meat that gets caramelized, the more flavour it will add to the chili.
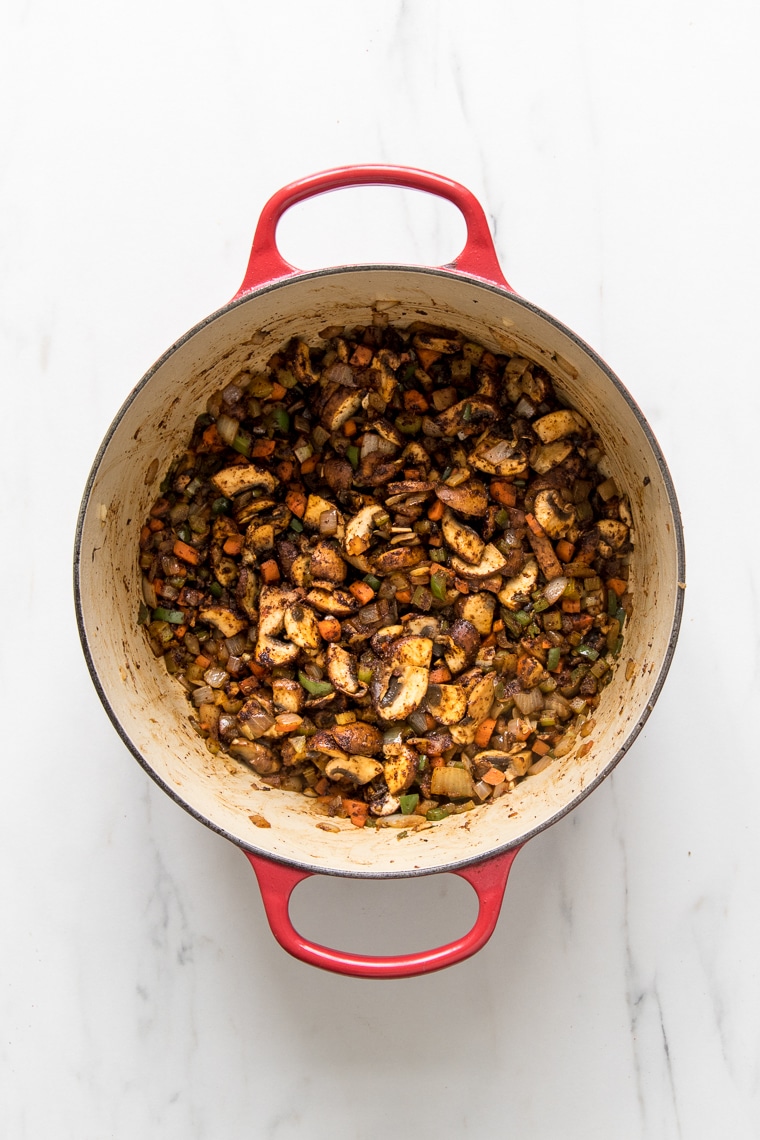
4. Using the same pot, add the onions, carrots, and celery. Season with ½ teaspoon salt, and cook for 3-5 minutes, stirring often, until it releases its juices, and begins to soften. Scrape any bits from the bottom of the pan up.
5. Add mushrooms, jalapeños, and garlic. Cook an additional 3 minutes then sprinkle in the chili powder, cumin, and cayenne pepper. Stir to coat the vegetables.
6. Return the beef to the pot and add the beans. Stir to coat with the spices then add the tomatoes, chipotle peppers, and beer. Bring to a boil then lower heat to a low simmer. Add the bay leaves, cover and cook for 2-3 hours, until the beef is tender.
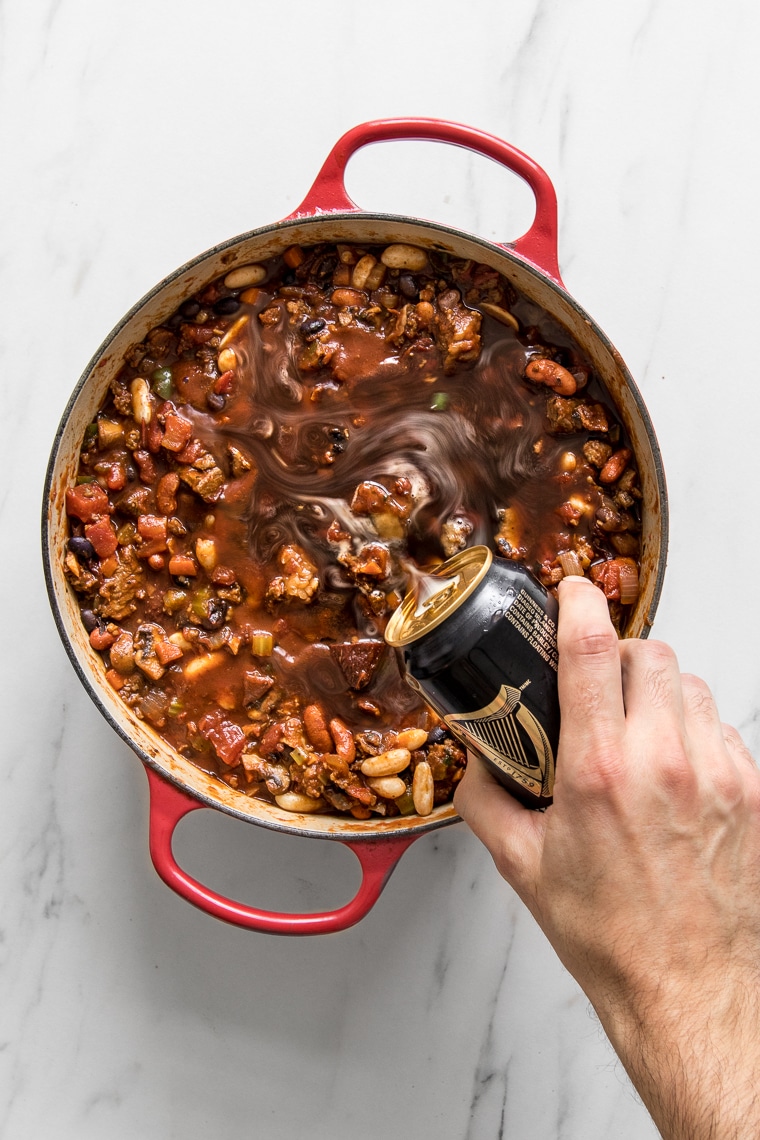
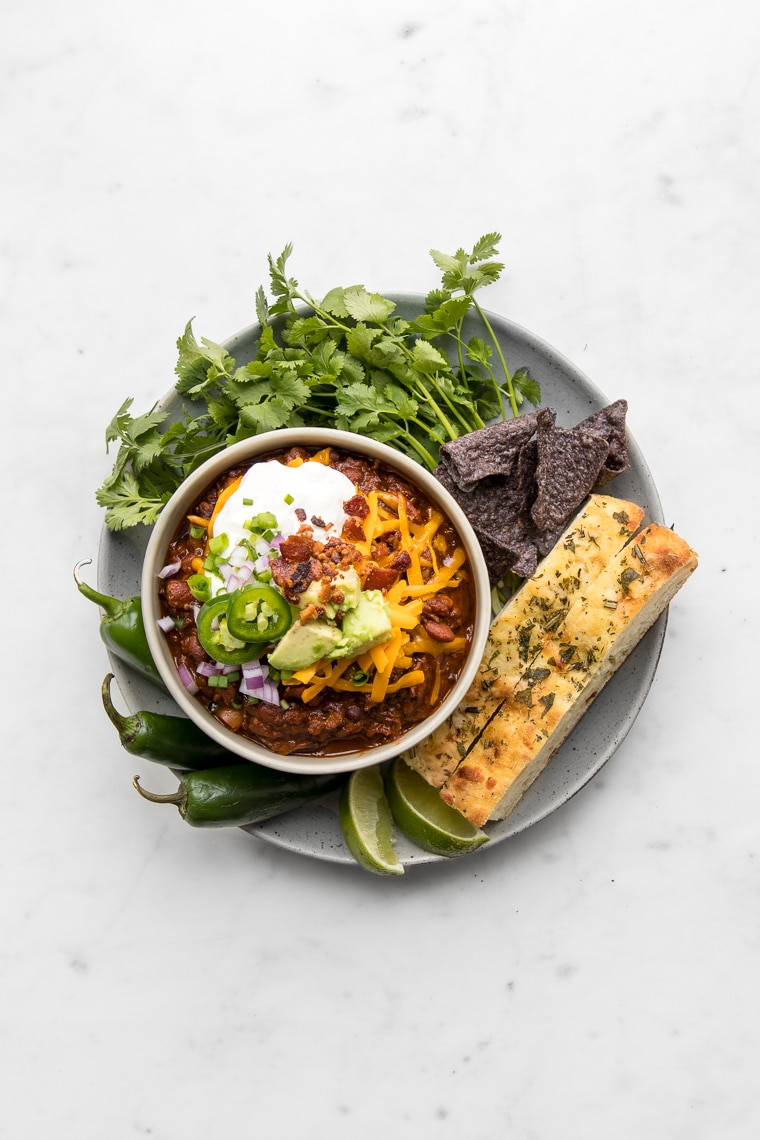
7. About 30 minutes before serving, remove the lid and allow to reduce and thicken slightly if necessary. Serve with your favorite fixings.
What is a Chili Bar?
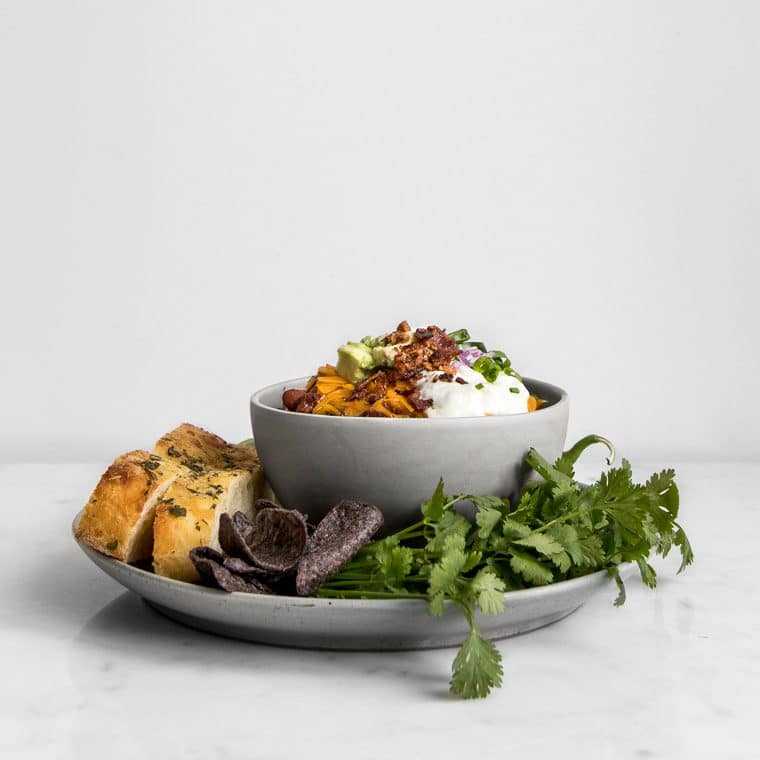
When it comes to food, the word bar is actually one of our favourites. A drinking bar, a chocolate bar, and most importantly, an insert-food-here bar. When it comes to hosting, a Chili Bar requires a pot of homemade chili (enough to feed your guests), spoons and bowls, and a whole lot of fun toppings that encourage guests to create their own unique and personalized chili bowls.
Plus, it's perfect for any allergies or dietary restrictions your guests may have since you can make a batch of homemade chili that satisfies everyone's preference (vegetarian or vegan chili is an excellent base) and then serve chili bar toppings like meat, cheese, and bread for others. The idea here is to make eating an experience, and what better vehicle for expressing creativity than a bowl of chili.
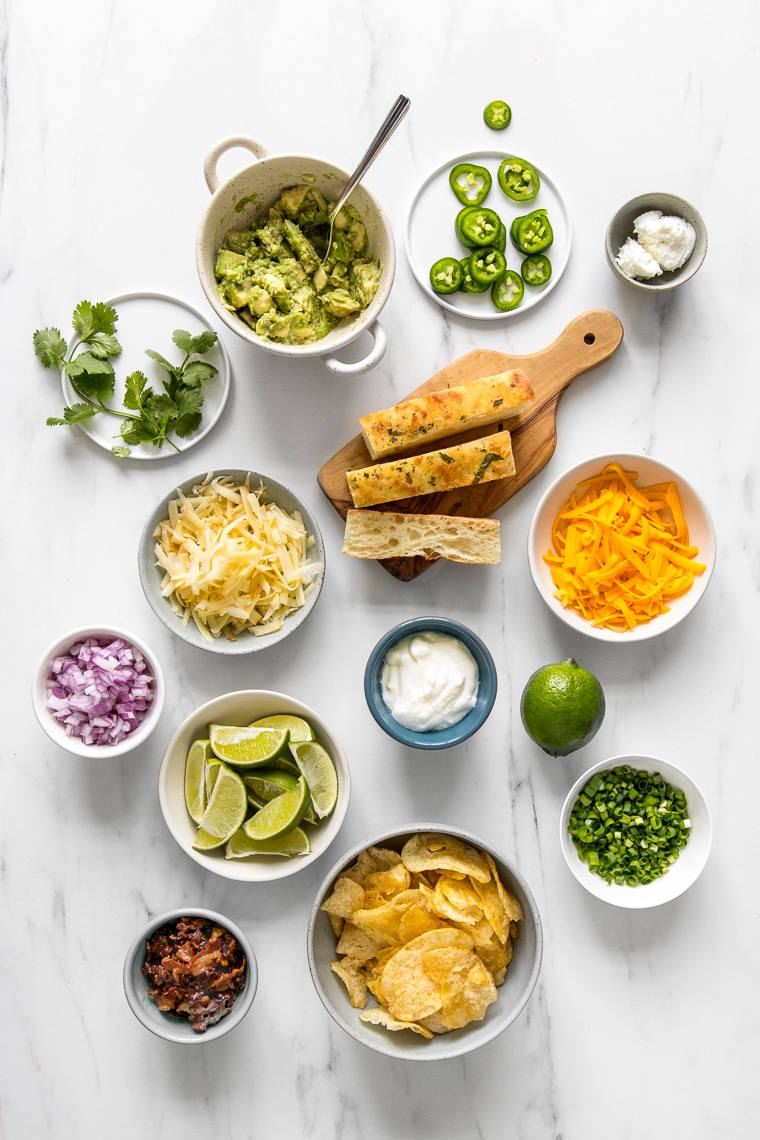
What You Need for a Chili Bar
Cheese
When it comes to cheese as a topping on a chili both Philip and I have very different opinions. He prefers the melt and flavour of a classic, orange cheddar, while I prefer the creaminess and tanginess of a goat cheese. Either way, having a few cheeses (even non-dairy options) for your guests to play with is part of the build your own chili adventure, and trust us, cheese preference is everything when it comes to melting over your homemade chili.
Sauces
Once the cheese has melted, adding a dollop of coolness to your chili bowl is essential for balancing flavours and textures. Like I mentioned, my childhood trifecta always included sour cream. A tip to keeping the sour cream cold is to serve your bowl over ice to ensure it stays cool on your chili bar. Other sauces you can serve is greek yogurt as a healthier alternative to sour cream, and guacamole or cubed avocado to add extra richness to your dish.
Veggies
While there are a tonne of veggies in our version of homemade chili, adding additional raw vegetables as toppings is part of crunchy factor. Slice a few jalapeños or hot peppers for extra heat, red pepper and onions for additional flavour and a variety of veggies for dipping or to be served on the side of your homemade chili.
Garnishes
The finishing touch on any homemade chili dish is like putting the cherry on top of a sundae, and if you're anything like us, a squeeze of lime, herbs and a sprinkling of green onions is enough to add pizazz to your already delicious homemade chili. Cut a few lime wedges, serve a bouquet of cilantro in water on your chili bar with sheers, and include pre-cut green onions.
Sides
Aside from your homemade chili, our favourite part is the sides that come with it. Our favourite sides to include in our Chili Bar include a few different types of chips (whether plain or tortilla chips), a few different types of breads from grilled crostini, buns, cornbread or herbed focaccia, dipping and scooping into chili is half the fun of eating homemade chili.
Optional: Meat
Depending if you're hosting guests with dietary restrictions reserve a side of meat or bacon for guests to add to their dishes.
Related Recipes


Recipe Card

Ultimate Homemade Chili
Ingredients
- 4 oz bacon chopped
- 1 lb sausage removed from casings
- 1 lb stewing beef cubed
- 1 large onion diced
- 2 carrots diced
- 2 stalks celery diced
- 3 cloves garlic minced
- 2 jalapeno peppers diced
- 8 oz mushrooms chopped
- 2 tablespoon chili powder
- 3 teaspoon cumin
- ½ teaspoon cayenne pepper
- 1 ½ cups red kidney beans drained and rinsed
- 1 ½ cups white beans drained and rinsed
- 1 ½ cup black beans drained and rinsed
- 2 cans tomatoes
- 1 can chipotle peppers in adobo sauce
- 1 can beer
- 2-3 bay leaves
- sea salt and fresh ground pepper
Instructions
- Preheat a large pot on medium heat. Brown the meat, starting with the bacon, cooking until crisp, about 5-8 minutes. Place the bacon in a bowl and remove most of the remaining crease.
- Next add the sausage in small chunks, spreading them around the bottom of the pan and ensuring there is space between each piece. Cook until browned, about 5-8 minutes. Remove the sausage into the bowl with the bacon.
- Season the beef liberally with salt and pepper and place in the pot, again ensuring there is space between each beef cube. Brown on all sides, about 5-8 minutes. Add the beef to the bowl with the sausage and bacon and return the pot to the heat, without cleaning it.
- Using the same pot, add the onions, carrots, and celery. Season with ½ teaspoon salt, and cook for 3-5 minutes, stirring often, until it releases it juices, and begins to soften. Scrape any bits from the bottom of the pan up.
- Add mushrooms, jalapeños, and garlic. Cook an additional 3 minutes then sprinkle in the chili powder, cumin, and cayenne pepper. Stir to coat the vegetables.
- Return the beef to the pot and add the beans. Stir to coat with the spices then add the tomatoes, chipotle peppers, and beer. Bring to a boil then lower heat to a low simmer. Add the bay leaves, cover and cook for 2-3 hours, until the beef is tender.
- About 30 minutes before serving, remove the lid and allow to reduce and thicken slightly if necessary. Serve with your favourite fixings.


Malcolm says
Use this as a base recipe for every chilli I make, making changes every time; vegetables, spices, meats. Great! Thank you
Philip + Mystique says
Hi Malcolm,
That's wonderful to hear and we're always happy when home chefs mix up the recipes to suit their needs or experiment. To us, it's the best way to cook. Thanks for stopping by and taking the time to comment and leave a rating. All the best!
Mandy Joseph says
The depth of flavour in this chili is unreal. Great tips for adding flavour and I love the Chili Bar idea. Thanks!
Chef Sous Chef says
Thanks Mandy